Sunday, April 24, 2016

More Beds! More Inches!

Today we started a few more seeds...


And added a few more raised beds to the garden. 


We put the hay in the bottom of the raised beds. Next weekend, we will pick up some more soil from our local gardening center. 

I also planted a couple of pots. One has strawberry and the other has a mixture of flower seeds and cilantro.


I added some more twine for a make shift tomato support structure.


The cucumbers are starting to climb the twine. 


The garden is growing, growing, growing.


All in all, I would say it was good day in the garden!


Friday, April 22, 2016

DIY Soil Testing

Since I used so much saw dust in the layering of the soil layers in my garden along with some of my own, cow, and chicken compost, I was curious whether my soil's pH could be off. I decided I would do some DIY soil testing.

After conducting some research, I settled on two different tests. The soil pH test and soil composition test. 

I used this graphic I located on Pinterest. 

Here are my two soil samples, mixed as 50% soil/50% water, and shaken. Then I added in one tablespoon  of vinegar to one sample and one tablespoon baking soda to the other sample. I continued adding a tablespoon at a time and checking for a reaction.


Then I added in one tablespoon  of vinegar to one sample and one tablespoon baking soda to the other sample. 

I continued adding a tablespoon at a time and checking for a reaction. I used a teaspoon to stir.


After adding about three tablespoons to each cup (with less less an a cup of sample liquid being tested), I had significant confidence that my soil was neither acidic or alkaline. 


Then to be certain I had actually added enough pH material to the mixture to actually affect the pH, I added a spoonful of liquid from one cup to the other and got instant bubbles.


Confident that my soil is balanced, I began then next DIY sample test for soil composition. 
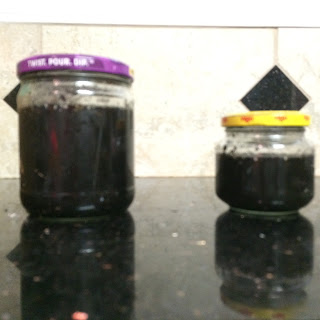
I used the website I found here. I took two soil samples from opposing ends of the raised bed and filled the jars 3/4 full, relative to the size of the jar. I used two different size jars because that is what I had on hand. 
Next I added water and detergent and shook well. 

Aftern one minute there was no change in the soil separation. 
I will take a reading tonight and tomorrow, although I believe I have basically created what is close to potting soil in my garden. 

These are the results after one day. I would say it compares pretty closely to the potting soil from the site I used as instructions. 
My Samples:


This is the soil samples from http://www.todayshomeowner.com/diy-soil-texture-test-for-your-yard/.

I think I pretty much have potting mix. 


As an update, I have added some scraps from my fridge to the top of the hay. I had some carrots, radishes, spinach, and romaine that had gone bad. We'll see if Ms. Ruth Stout's method works. You can see the pieces of carrot in the progress photo below:


Monday, April 18, 2016

A few more inches

It's been a week, and the plants have really taken off. 
My kitchen garden is growing so well, that I may go ahead and put in another raised bed right beside this one. 


I'm very excited to try out the gardening method described here. I came across this article some time ago and saved it in my interest page. I'm excited to add my compost contributions directly to the garden. We will see if this works. I'm always curious to find techniques that decrease the total amount of labor needed for a successful bounty. 

I already have baby strawberries and green peppers. 


I carefully inspected each plant to see if I had aphids or any other pests. I was surprised to see the bottoms of all leaves are clean. 
I did see evidence of a caterpillar (I think), with an egg plant leaf almost missing in its entirety. 
I noticed some weird spots in the inner leaves of the strawberry. I'm not sure what is causing them.


I looked over the plant pretty thoroughly, but didn't see evidence of any pests. 

Next, I got busy adding the straw to the top of the garden. In the article it states, "You need at least twice as much as you would think." The article calls for 8inches, but perhaps less if you use bailed hay. I was using baled hay. Good hay, that I bought; unfortunately, there isn't much in the way of livestock close to where I live. 
I barely made a dent in the hay. I plan to utilize the rest in building out the rest of the backyard. I find myself getting excited thinking about what kind of projects I can do to make use of the excess hay. I also ended up with some excess bags of play sand that we originally intended to fill the base of basketball hoop. (We went with water instead, hence the extra sand). I'm thinking I may build a fire pit :)

Here is the left over hay after spreading it in the garden. 


In the article it talks about wood shavings, which I used in my garden possibly making the soil acidic. I'm thinking I may need to get a soil sample. I'm hoping the 50% sand mixture that was completely devoid of all nutritional value will offset any acidity introduced into the soil. (Eeek)

I plan to test with this method…


Here is the garden with hay around each plant. I took care to protect the plants has I added the hay. 


Finally, I needed to add some string for the climbers. I used some left over twine that I had in the garage. (love free!)


I'm thinking about adding the twine across the garden bed in an "x" shape to support the tomatoes when they get big enough. I may break down and pick up some of the wire hoops instead… we'll see. 

So far, I've been watering it pretty regularly (hitting it with a hose every other day).